

Understanding the Long Combo Option Strategy: A Comprehensive Guide
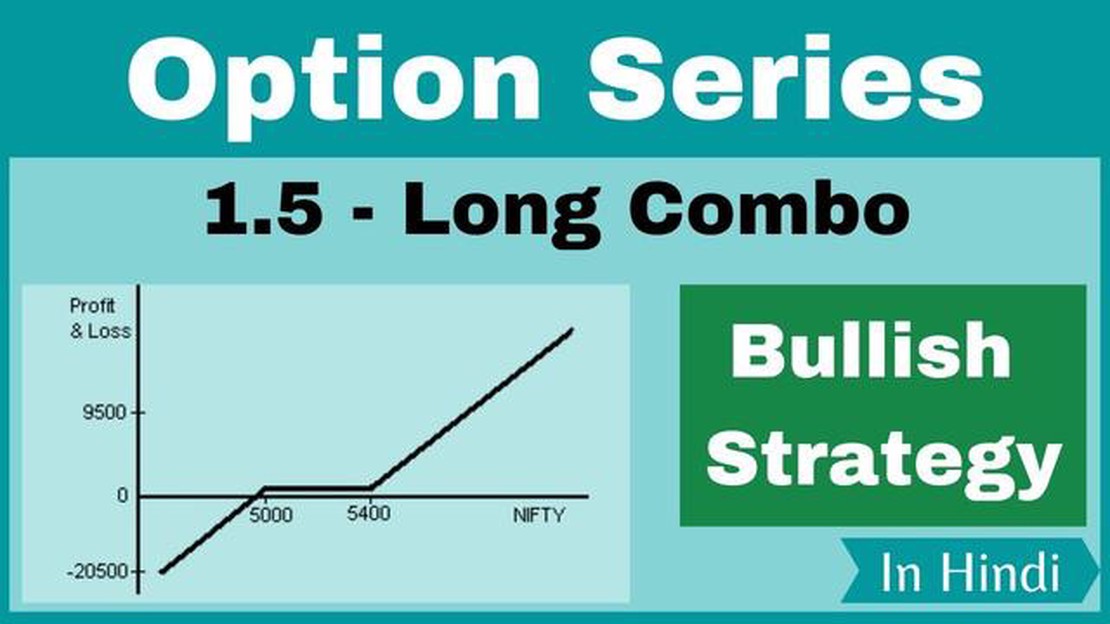
Long Combo Option Strategy Explained Options trading can be a complex and often risky endeavor, but for those willing to put in the time and effort to …
Read Article

Forex trading can be a challenging endeavor, requiring careful analysis and decision-making. Fortunately, there are tools available that can assist traders in their analysis and improve their trading strategy. One such tool is an indicator, which helps identify trends, patterns, and potential entry and exit points.
If you are using Forex Tester, a popular trading simulator, you can easily add indicators to enhance your testing and analysis. In this step-by-step guide, we will walk you through the process of adding an indicator to your Forex Tester.
Step 1: Download the Indicator
The first step is to find and download the indicator you want to add to your Forex Tester. There are many websites and online communities where you can find indicators for free or for purchase. Make sure to choose an indicator that is compatible with Forex Tester.
Step 2: Install the Indicator
Once you have downloaded the indicator, you need to install it on your computer. Usually, indicators come in the form of a file with an “.ex4” or “.mq4” extension. To install the indicator, simply copy the file into the “Indicators” folder of your Forex Tester installation directory.

Step 3: Open Forex Tester
Next, open Forex Tester on your computer. Once the program is running, you will see a toolbar at the top of the screen. Click on the “View” tab in the toolbar and select “Indicators” from the drop-down menu. This will open the Indicators window.
Step 4: Add the Indicator
Read Also: Understanding the Impact of Payroll Taxes on Non-Qualified Stock Options
In the Indicators window, click on the “Add Indicator” button. A dialog box will appear, allowing you to choose the indicator you want to add. Select the indicator you installed in Step 2 and click “OK.”
Step 5: Customize the Indicator
Once the indicator is added, you can customize its settings to suit your preferences. This may include adjusting the time period, color scheme, or other parameters. Experiment with different settings to find the configuration that works best for your trading strategy.
Step 6: Apply the Indicator
After customizing the indicator, you can apply it to your Forex Tester chart. To do this, click on the “Charts” tab in the toolbar and select the chart you want to apply the indicator to. Right-click on the chart and choose “Indicators” from the menu. In the Indicators window, select the indicator you added in Step 4 and click “Apply.”
Step 7: Analyze and Test
With the indicator applied to your chart, you can now analyze and test your trading strategy using Forex Tester. Use the indicator’s signals and insights to make informed trading decisions and evaluate the effectiveness of your strategy.
By following these step-by-step instructions, you can easily add an indicator to your Forex Tester and enhance your testing and analysis. Remember to choose indicators that align with your trading strategy and to continuously evaluate their performance for optimal results.
Read Also: Understanding Sentiment Trades: What They Are and How They Work
Adding an indicator to your trading platform can be a valuable tool in analyzing market trends and making informed trading decisions. Here is a step-by-step guide on how to add an indicator to your Forex Tester:
By following these simple steps, you can easily add an indicator to your Forex Tester platform and enhance your trading analysis. Experiment with different indicators to find the ones that best suit your trading style and strategy.
To add an indicator to your Forex Tester, you need to first download the indicator file. Here are the steps to download the indicator file:

| Step 1: | Go to the website where the indicator is available for download. |
| Step 2: | Locate the indicator file on the website. |
| Step 3: | Click on the download link for the indicator file. |
| Step 4: | Choose the directory on your computer where you want to save the indicator file. |
| Step 5: | Click the “Save” button to start the download. |
| Step 6: | Wait for the download to complete. |
Once the indicator file is downloaded, you can proceed to the next step of adding the indicator to your Forex Tester. Make sure to keep track of the directory where you saved the indicator file, as you will need it later in the process.
Forex Tester is a software that allows traders to simulate and test their trading strategies using historical market data. It helps traders to improve their trading skills and make more informed trading decisions.
Adding an indicator to Forex Tester can enhance your trading strategy by providing additional information and signal confirmation. It allows you to test the effectiveness of the indicator on historical data before using it in live trading.
Yes, you can add custom indicators to Forex Tester. It allows you to import and use any indicator that is compatible with MetaTrader 4.

Long Combo Option Strategy Explained Options trading can be a complex and often risky endeavor, but for those willing to put in the time and effort to …
Read Article
Find out which bank offers the best forex rates When it comes to exchanging foreign currency, finding the best exchange rates can save you a …
Read Article
Can you beat the market in an efficient market? An efficient market is one where prices of securities always reflect all available information, making …
Read Article
Understanding the Determination of Exchange Rate in an Open Market Exchange rates play a crucial role in the global economy as they determine the …
Read Article
Is Ireland a free trade zone? Ireland, known for its stunning landscapes and rich culture, has also established itself as a major player in the world …
Read Article
Ways to Check HDFC Forex Card Status If you are a frequent traveler or planning to go abroad, having a forex card can make your life easier. HDFC …
Read Article


